Showing posts with label Recipes. Show all posts

17 April 2017

Vegetarianism and our favourite black bean tacoes

You can't trundle along the green living route very far before you bang into vegetarianism and its hard-core cousin veganism. Sheep and cattle burp out potent greenhouse gases, so we need fewer of them, not more.

But perhaps something that's good for the planet is bad for us personally? The two things that have swayed me most to believe that this is not the case is the Blue Zones research, and (far more subjectively) Jane Goodall. She's vegetarian, in her 80s, sharp as a tack and travels something like 300 days a year to raise environmental awareness. If that kind of mental alertness and physical stamina comes with vegetarianism, I'll take it, thanks.

The beautiful simplicity of a pot of soaking beans.


The family problem

For many of us, the decision doesn't lie fully with us, because we eat as part of a family. The key to persuading others is finding vegeterian meals they like. I haven't found enough of these meals yet, so we are still eating red meat about once a week, chicken once or twice, and fish once.

But here is our favourite vegetarian meal - in fact it is my thirteen-year-old's favourite meal of any that I cook! He loves to have leftovers on rice for breakfast. I have them for lunch. Yum.

Over Easter I made this for extended family. My 10-year-old nephew ate FIVE tacoes, and kept asking if there was still more meat. He couldn't believe it was all beans!

You can use tinned black beans, but it's much cheaper to buy the dry ones from the Bin Inn.
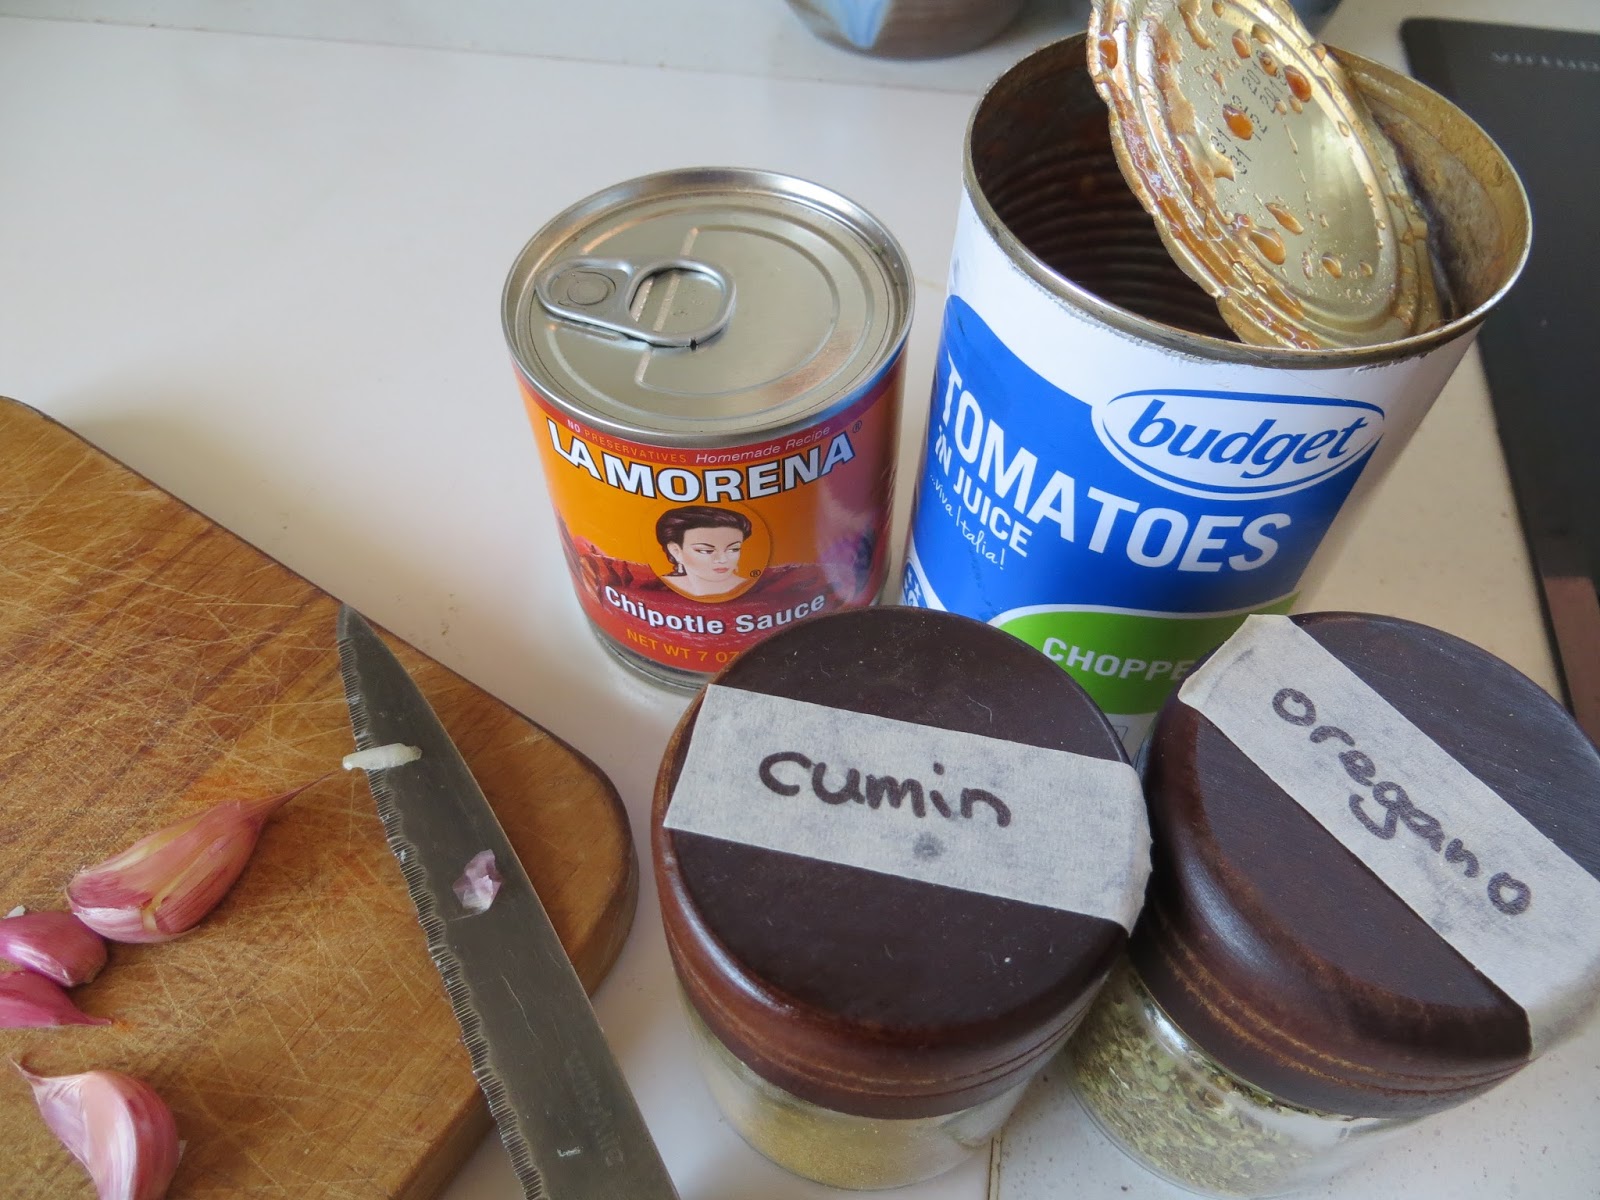
Some key ingredients.

Black Bean Tacoes 

Feeds four, at least.

Black bean mixture (this is the main event)
2 cups of dried black turtle beans, soaked overnight and rinsed twice (I admit I don't measure the quantity these, but the recipe is forgiving)
1 chopped onion
1 Tblsp Tio Pablo Mayan Gold mexican seasoning mix (optional, but good... add at least double the cumin and oregano if you don't have this)
2 tsp cumin
3 tsp oregano
1 tin chopped tomatoes in juice
3 cloves finely chopped garlic
2 Tblsp La Morena chipotle sauce*  (optional, but really adds something extra)
chilli to taste (chopped fresh chilli, or dried powder)
salt & pepper

Gently fry the onion in olive oil until soft.
Add the spices and fry for a minute or two.
Add remaining ingredients apart from salt (add this once the beans are soft).
Add water to cover the beans if they are uncovered.
Cover the pot and simmer for about two hours (longer is good). Ensure the beans are covered with liquid by adding more water if necessary. They need to be so soft that you can squash them against the roof of your mouth with your tongue. The mixture shouldn't look like beans floating in liquid, but a thickened, stew-like mess of filling deliciousness. If it's too wet, boil it with the lid off for a while to reduce it.

Mmmm, what's that smell?
(Don't worry about what it looks like!)

Check that the flavour is full and spicy. Add more of what you need - sufficient spices are the key to this.

Don't worry that the beans are not cooked before you start! Cooking them this way means that as they cook they absorb all these wonderful flavours. It does NOT mean you will be crippled with flatulence.

Serve with guacamole, shredded lettuce, grated carrot and grated cheese. Each person should stuff these goodies, along with the bean mixture, into either their taco shells (baked for 5 minutes to warm and crisp them) or tortillas (home made ones are awesomely cheap and miles better than bought ones, but do take a while to prepare). Also very good with rice.


* Available from some supermarkets and the Tio Pablo website.

14 May 2016

Dummies' guide to growing root veg

When autumn comes, I always adore the colours on the street trees in our local neighbourhood. The leaves have mostly fallen now, but a couple of weeks ago they looked like this:


What a wealthy, leafy suburb we live in! I always feel a bit overwhelmed at the privilege of it at this time of year. (Although, when you look inside the houses - and yes I am an open-home snooper - they are pretty dated and worn out, in general.) 

Out the back of our house, the veneer of the genteel look disappears, and there is a riotous little Good Life going on! Chickens, vegetables and abundant fruit, all a bit messy but very productive.

Carrots and parsnips from seed tape

These days you'll always find carrots and parsnips growing. We never used to bother with them, because it seemed too hard to get them to sprout reliably where we wanted them. They seem to sprout well if you let a plant go to seed and drop where it will, but with the root veg I like to control where they grow. And I dislike thinning.

Rows of carrot seedlings.

Then I discovered the fail-proof seed tape! It's like a strip of tissue with seeds impregnated in it at just the right distance apart. The seeds all sprout, and they are generally the right distance apart, although I do thin the carrots lightly, as I'd rather have 30 good sized carrots than 50 small ones. The parsnips don't seem to need it.


How to do it

In poor soil, nothing's going to grow well. So firstly, I put some compost on the soil and mix it up a bit. Then I make a 1 cm or so deep trench with my finger. I lay out the seed tape in the trench, then cover it lightly with soil. Finally - and crucially - firm the soil down well over the tape. Those little seeds do not like to meet air pockets.

Then - also crucial - keep it moist, watering lightly every day if it's hot and dry. Once the seeds have started to sprout, they need moisture or they'll die.

Huge, but not at all woody.

Why bother?

I used to think that carrots were cheap enough that there was no point growing them. But the taste...eating a raw shop-bought carrot is a chore. A homegrown one is a pleasure - sweet, crisp and light. 

Parsnip? I used to detest the very word. I'd only had watery mashed ones, long ago in university halls of residence. Then one day somebody gave us some from their garden, and my sister in law roasted them (or did she make parsnip chips?). I have loved them ever since, especially as part of a roast dinner, with gravy.

The perfect roast

Our potatoes failed utterly this year due to trying a new and unsuccessful space-saving method, so when roast time comes around, instead of spuds I have our home grown starchy veg. These are parsnips and some butternuts I grew next to a compost bin and over a fence. Our fussy children still have potatoes though (bought ones). 

One seedling (grown from a saved seed) grew about 12
butternuts on the goodness of a fine compost bin.

Winter or summer?

I planted the current lot of parsnips in mid summer, and they are ready now, but will sit happily in the ground all winter waiting to be dug up when needed. Indeed, they will become even sweeter when (or if) we get a frost. If I leave them until spring, they'll go to seed. They will still look all right when I dig them up, but be inedibly woody. I'll plant some more parsnip seed tape in spring, and they should be ready about mid summer. 

Carrots grow faster than parsnips, but both grow very slowly or pause completely in winter. Our current lot (planted in about February or March) will have to do us over winter, and I'll start planting more in September. Or if this crazy warm weather lasts, I might try sowing more in winter. Because the season is madly warm. Look what I got out of our garden last week, in the last month of autumn!

A late autumn harvest. Beans and tomatoes in May: what the heck?

We live in Hamilton, New Zealand: I have no idea how these things work where it's hotter or colder. 

Also, we have had a lot of grapes. So, so many grapes. Sadly they are now mostly feeding hundreds of wasps.

Green grapes "Niagra"

Ah, vegetable gardening. Still loving it, after all these years (23 years, minus 4 when I was overseas, from student to worker to mother).

4 February 2016

Plums and tomatoes in winter

A few years ago a friend served me plum sorbet she'd made in her icecream maker. The plums were from her backyard tree, and I was so impressed by the winter flavour burst of summer plums that I promptly bought my own icecream maker. Sadly it has mainly sat in the cupboard, and you might see it on Trade Me soon.

My version

Now I have come up with my own way of having my hit of plums all year round. Our Hawera plum tree is dropping more fruit every day than we can eat, and many of them are over-ripe. Roughly chopped and frozen, though, and added to a smoothie, they are incredible. Better than frozen berries, I reckon, and I know that's saying a lot.


My smoothie has a banana, frozen plums, kefir (or unsweetened yoghurt) and a teaspoon of coconut oil. I whiz it up with a stick blender. It's delicious, cheap, healthy and filling.

Harvest tomato sauce

We manage to eat enough tomatoes around here that we don't have a lot left to cook with - or maybe the problem is that we don't grow enough. Anyway, I buy big, cheap bags of cooking tomatoes from the Farmer's Market. Then I make Annabel Langbein's Harvest Tomato Sauce (see the recipe here). It is the BEST, and incredibly easy - in spite of what the recipe says, you don't even need to chop the tomatoes - just throw them whole into the roasting dish with the other ingredients, stir and put in the oven. It gets pureed after cooking and cooling.


I also modify the recipe by leaving out the capsicum (purely because we scoff all those raw), chilli and sugar.


Then I freeze a lot of it in old honey containers. We use it on pizza bases, on fried eggplant for eggplant parmesan, and with pasta and meatballs. My children love to eat it by itself with spaghetti noodles, too.

Enjoy!


23 February 2015

Solar powered bread rolls

I'm building up to a post about our new photo-voltaic panels, lovely things that they are.

In the meantime, here are the details of some Very Good bread rolls I make quite regularly. Recently the rising and baking of these rolls in this house has been powered exclusively by the sun. I reckon that's so green that I might as well be hand-stitching a quilt of rabbit pelts harvested from my backyard rabbit farm. If I had one.


When I bake these I feel like Ma on Little House on the Prairie in her hand-built cabin, or maybe Milly Molly Mandy's Mother, sheltered by her thatched roof. How those women would have loved my breadmaker*! Not only would they have hand-kneaded their bread, but they would have had to light a fire to bake it, even in mid-summer. My weak arm muscles quiver at the thought.

This dough is actually a pizza base recipe from my friend of nearly 30 years, Sandra. (Sandra, how old we are growing!) The original uses all white flour and is definitely my favourite pizza base, too.

Solar Bread Rolls

(Of course you don't need solar power or a bread maker to make these; I am not that demanding.)
This takes about 15 minutes total effort with a breadmaker* (three bouts of five minutes). If you start at 10 am they'll be freshly baked for lunch.

1 3/4 tsp active dried yeast (not the breadmaker sort)
1 tsp salt
1-2 tsp sugar
3 3/4 cups of flour (making it as wholemealy as my family will tolerate, I use about 2 1/2 cups of wholemeal flour and the rest plain white)
1/4 c olive oil
1 1/3 cups water

You know, don't you, that the ratio of flour to water is crucial to making good bread? Therefore, you need to measure those ingredients carefully. Everything else you can be somewhat gung-ho with.

Place everything in a breadmaker* and mix on the fastest dough cycle. I have a Panasonic breadmaker with a pizza dough cycle that takes 45 minutes. Alternatively, mix it all together by hand, knead for 10 minutes and leave to rise in a warm place for 45 minutes or so.

Shape into balls with floured hands. Dip each ball into white flour to lightly coat it before sitting it on an aluminium baking tray. The flour coating stops the rolls sticking to the baking tray, making for an easy clean up. It's also very pleasing to the mouth.

Cover the dough balls and tray with a clean tea towel and place somewhere warm in direct sunlight: a sunny concrete patio or deck, a barbeque or even a trampoline all work well. Give strict instructions to the children if it's the latter. If it's not a verywarm day, place in an oven at 40oC.

After an hour or so the rolls will have risen beautifully. Remove the tea towel and place the tray in a 190oC oven. You can either preheat the oven, or put the tray directly in there as you turn it on. They should be baked within 10 minutes of it reaching full temperature.

These are good the same day and okay the next. After that they're chicken food, or you could freeze them ready to split and fill with garlicky/herby butter for when you want garlic bread.

*For a rave review about the gourmet and bank-account-flourishing benefits of owning a breadmaker, have a look at this post on my new favourite blog, Mr Money Mustache.

21 April 2014

Recipe for healthy chocolate

If all that Easter chocolate is feeling a wee bit unhealthy, try this recipe. I make it often and everyone adores it. I think it's as nice as real chocolate. It's more like fudge than chocolate, but I think it's a fine substitute. You'll be impressed, I promise.

I got it from the Homegrown Kitchen blog, and have modified it only very slightly. You definitely need a food processor for it. I usually make double this quantity.

Best of all, it's faster than anything else I know how to 'bake'.


Raw Mayan Chocolate Fudge

1 c dates
1 c raw cashews (I have successfully substituted some of the cashews for almonds)
1 c dessicated coconut
1/3 c cocoa powder
pinch salt
1/2 tsp cinnamon
1/2 tsp vanilla paste (or you can use 1 tsp vanilla essence)
zest and juice of one orange, tangelo or similar
2 Tbsp virgin coconut oil (the stuff that tastes and smells coconutty)

Soak the dates in boiling water for at least 10 minutes, then drain. Process cashews and coconut until they are finely ground. Add everything else, including the dates, and process some more until it's uniformly sludgy.

Press into a tin of some sort and refrigerate until firm.


18 October 2013

Slimy milk and other dirt cheap health supplements

As I wrote in my last post, I've been reading Lyn Webster's Pig Tits and Parsley Sauce book. When you're living on a budget as limited as hers, there's not an ounce of room to buy health supplements. It occurred to me that I make some so cheaply that they wouldn't even dint the budget. Here they are:

1. Probiotics. I eat fermented milk - in other words, yoghurt - every day. For about a year now I've been doing it in an unusual way.


Some people buy ready-made yoghurt. I rarely have - it's expensive and the packaging is never recyclable - but used to always use an easiyo yoghurt maker, and I'd make unsweetened yoghurt with whatever brand of yoghurt sachet was on special at the supermarket. I did this for a very long time - in fact, I have the same yoghurt maker I bought when I was 19 and first went flatting!

But now I have a cheaper and more environmentally friendly option. No more foil packets or electricity to dry the milk at the factory, or boil water for my yoghurt maker. And it costs exactly the same as milk, whereas the sachets, which are mixed with water, cost significantly more.

I make Caspian Sea yoghurt. I bought it from here. It is so wildly simple: you mix a bit of yoghurt with milk (about 1 part yoghurt to 10 parts milk) in a clean jar and sit it at room temperature for about 12-18 hours. Then you have a new batch of yoghurt! It apparently has more healthy microflora in it than other yoghurt, although I have no evidence for that.


The only trick is not to eat it all up without saving some to make the next batch. Also, I find it doesn't last as well as other yoghurt. The sachet yoghurt lasts about two weeks, but five days is long enough for the Caspian Sea stuff. You can make as much or as little as you like though, so it's wise to make only as much as you need.

It does have a slightly different taste - sharper, more fermented. You get used to it though.

(If anyone who knows me personally wants to try this, let me know and I'll drop you round a jam jar of yoghurt. It's a 'share the love' kind of thing, and the more people  it's shared with the better, because then you have someone to ask for more if you accidentally eat all of yours!)

2. Essential fatty acids. Some people buy ground LSA (linseed, sunflower and almonds) for the good essential fatty acids they contain. I buy whole linseed from the Bin Inn, where it's dirt cheap. I grind it with a $10 coffee grinder I bought on Trade Me, and keep it in glass jars in the fridge so its delicate oils don't oxidise. I grind two or three weeks' worth at one time, and we have it on our breakfast weetbix or porridge. It also goes well in smoothies.

Often I also grind up sunflower and pumpkin seeds and add them to the mix. I used to grind almonds, but broke several coffee grinders in the process. Now I just gobble a handful of them when I'm hungry. If you're going all pig-tits, just linseed would be the best option.


3. Raw greens/juices. I don't have a juicer and I don't buy spirulina. But silverbeet grows wild in the garden, and every two or three days I make myself a green smoothie by adding a couple of raw, well-washed silverbeet leaves to a jug with yoghurt, a banana and some vanilla paste. I whiz it up with my stick blender and it is totally delicious, not silverbeet-y at all. I have not had a cold all winter, despite some other family members oozing germs, and I do think the silverbeet might have had something to do with it.


Sometimes I add these things too when I'm feeling decadent: frozen berries, two teaspoons of cocoa and a teaspoon of raw virgin coconut oil. Then I get a coconut/berry/chocolate flavour and it is very, very good. I know, chocolate and silverbeet - who would have thought! Trust me, the silverbeet regresses.


Pig-tits sticklers would use just bananas (probably old and marked down in price accordingly), yoghurt and silverbeet, and perhaps cocoa.

Do you have any other ideas for real food supplements on the cheap? Possibly home made sprouts count.

3 August 2013

What to eat

I'm up early. I've long wanted cultivate the habit of rising early and exercising either my body or my mind, either by walking, yoga or writing. It would be a recultivation, really, because I lived that way for a decade or so before having children.

It would mean, of course, sacrificing pleasant evenings once the children are in bed, because sleep has to be had some time, and I get dog-tired by the end of the day if I'm up early (and sometimes even if I'm not). How wonderful it would be, I think, to need just a few hours of sleep!

However, these days the pull of sleep and bed is so strong and delicious that ... well, you can guess the outcome.


Upon rising I lit that centre of winter cosiness for our family, our woodfire. In fact it was already 20 degrees in our living area, so the flickering flames are definitely pure luxury. A boy with an ear infection is likely to emerge soon, though, and yesterday his main needs were for the fire, the cat and a book. Perfect.

I'm not compelled to rise early to toil in the fields, and fuel is so plentiful we can warm myself whenever I want (thank you husband, for chopping it). Which brings me to food. How many societies throughout history were able to choose to eat the type and amount of whatever food they wanted? It is the lap of luxury, and the delightful guiles of junk food seem to be ruining our health.

People I know and others I read about seem to be throwing themselves into one or other health-improving diet. There is the paleo diet: no grains (oats! flour! rice!), legumes or dairy, and not much fruit. Lots of meat, nuts, vegetables and fat. Then there's the Nourishing Traditions diet, taken from the book of the same name. All grains must be fermented, all dairy unpasteurised, and meat, vegetables, fruit, fat and soaked nuts are staples. Lastly there's the vegetable based, non-dairy diet, which is what much of the world is forced to consume anyway.

People who have set themselves up as experts in these diets explain the theoretical evidence for their diet over the others, and offer lots of success stories. But in terms of long term trials of people on one diet vs. another, the evidence seems to be lacking. Apart from glaringly obvious fact, that is, that if the diet excludes junk food and excess, and includes lots of vegetables, it's going to improve health.

There is, however, one diet that has been trialled and found to be a winner, and it has a little meat, a little dairy and unlimited vegetables, fruit, nuts and lentils, along with hefty servings of olive oil (four tablespoons a day). It's the Mediterranean diet - specifically mimicking what people in Crete used to eat (they've since moved on to burgers, from what I've read, and things have gone down hill for them healthwise).

Lower cholesterol and heart disease, blood sugar control in diabetics, less risk of cancer, Parkinson's and Alzheimer's disease, fewer menopausal symptoms. What more could you want? Reassuringly, the results come from published scientific studies, not someone's diet blog!

My mouth waters at the thought. Did you ever make the eggplant parmesan recipe from my blog? Roll on summer! Here's a blog I found, Olive Tomato, that is written by a Greek-American nutritionist and is laden with good-looking recipes.

All the diets largely exclude sugar, which I suspect is one of the biggest health baddies. Most people eat so much of the stuff, yet until a couple of hundred years ago it was scarce and fiercely expensive. Bodies don't adapt that quickly. (The Cretans had two to three sweet baked things a week. I can live with that.) They also involve a lot of vegetables - far more than the small pile of peas that furtively perches on the traditional New Zealand dinner plate each night, cowering off to the side in order to leave room for the meat.

This early-up body is hungry now. Soaked oats and dates are waiting to be cooked into a sweetish porridge. Breakfast is one meal I always get right.

(I pulled the info on the Med diet from the print version of this Listener article. Only subscribers can get full-text at the link. I also glanced through this study in the New England Journal of Medicine.)

7 July 2013

Homegrown kitchen

When I was growing up I thought I hated tomato soup. The only type to grace our kitchen was from a tin, and I think it was the smell I couldn't bear. I remember being horrified when I saw my mother put it in a mince dish that I liked. She always put it in there, she said, and I thought I'd been tricked!

No more, no more. There is no tinned soup in my pantry, and on Friday I made a vegetable tomato soup.

It was from the blog of chef-and-mum Nicola Galloway of Nelson, NZ, who also blogs about crafts and gardening. It's Homegrown kitchen, and not only is it gorgeous, it has inventive healthy food ideas that really appeal to me, with lots of emphasis on things that (most) children like.


I added chickpeas to make it a bit more long-lasting in the belly. The recipe (see link in previous sentence) looked, I thought, like it might be a bit boring. Not true - I loved it! It's all gone now.

I also made some chocolate almond milk and oat milk from her recipe. I felt inspired at the thought, because I am avoiding dairy (apart from yoghurt and the odd cheese sauce on lasagne) and I dislike tetrapak with a vengeance (all commercial alternative milks come in tetrapak cartons). The milks were quite easy to make, and I'd link to her recipe here but for some reason only the homepage URL comes up when I go to the recipe. The quantity made was small, though, and I only hope I can be bothered with the process every day or two... perhaps I can upscale.

8 May 2013

Cinnamon doughnuts for a picky eater

It's ironic that a boy who has never been easy to feed is somewhat of a gourmand (in that he prized good food, not that he eats to excess - he never does). For his birthday he wants a food party, with his favourite dishes to share with his friends, and his request for the school holidays was to make cinnamon doughnuts.


It was with the help of this 1960 retro cookbook discovered in a church op shop that I found the recipe. There are plenty more old goodies in the for me to try also. About five types of gingerbread, for a start!

(If you're looking closely at this,  we missed out the jam.)


 They were deep fried, which scared me a bit as I haven't done that for about 20 years. The children rolled the fresh doughnuts in a mixture of cinnamon and sugar; although the recipe called for just sugar, Jack insisted on cinnamon, a spice we all love.


They hit the mark, and by lunchtime the next day, 31 doughnuts were gone. We couldn't eat them all the evening they were made, said Jack. "That's enough! We don't want to overeat!"

Regarding the eating personality pictured above: once I read a book called 'Eleni' who featured a similar personality, this time a girl. I can't recommend the book because although it was amazing, it was the saddest book I've ever read. It's a true story.

Eleni's daughter was like Jack. She loved the best quality food and couldn't bring herself to eat things she didn't like. The family was living in a time of famine (due to a communist occupation) and she couldn't force herself to eat the meagre scraps they could find. Eventually she was drafted by the communists, along with the other teenage girls of the village, and taken for military training in another village. Their food was a big common pot of soupy stuff, and although she was by now starving to death, she couldn't eat it.

The communists ejected her from their army, because a soldier in such poor condition was no good to them.

So when you say 'Eat it or starve', there is indeed the odd person who starves! We're working on it though. Our extremely lean young man's 'normal food' repertoire is increasing every month.

29 April 2013

Holiday lip treat

It was ironic that it was with traumatised lips (see my last post - sorry it was so long ago - much energy has been used to heal my lip) that I first made my own lip balm. Most of the irony lay in the fact that this lifelong lipbalm addict couldn't even use it! (Perhaps I won't need it so much with my new lip skin? It's too soon to tell.)

But it had been months since Anna and I had bought a block of beeswax from the Farmer's Market, and we'd been sniffing its heavenly honey scent periodically, as I wondered what on earth I'd do with it.

Then I found a 'non-petroleum jelly' recipe on a blog (actually, the same recipe's on lots of blogs: it's 1 oz (25g) of grated beeswax to 1/2 c olive oil).

So, it being school holidays and a perfect time to do a few shared projects, Anna and I got to work last weekend.


We used grapeseed oil instead of olive oil because I didn't like the idea of the olive oil smell on my lips. Grapeseed oil is odourless. Also, we added 4-5 drops of lavendar oil.

You just need to put it all in a pot, and melt it really slowly.


Once it was all melted, we poured it into little pots. I've been collecting them for a while now, with the intention of doing a project like this.


It seems good! The texture is right and the lavendar smell subtle. I've sneakily swiped my new lower lip skin a couple of times with it, although I'm only meant to be putting antibiotic cream on it.

It was VERY cheap to make. I think the beeswax block was about $2 and we used less than half. There was probably $1 or so worth of grapeseed oil in it, and the lavendar oil was so scant that it was virtually free. It made enough lip balm to last for months.

Next time I might add honey, stirring it in once the balm started to cool. I'll also be wearing an old shirt or apron: there's potential for a big mess. Very hot water, however, cleaned up the pot, grater etc just fine.

I love the idea of using something totally natural made by clever bees. Isn't the internet the most amazing source of ideas?

3 April 2013

Home made mozzarella

I don't make preserves or jam, so in some ways I'm a bit of a lazy gardener/eco-fruge (short for frugal person).

But recently my mother gave me a recipe for home made mozzarella that I got excited about. I love the idea of home cheesemaking, and the recipe said that this one takes eight minutes! It took about 15, but I can live with that because I got on with other food preparation during that time, while the milk warmed.

I needed no special equipment apart from some disposable rubber gloves.

I love mozzarella, and it's pricey.

I made little salads with homegrown tomatoes, oregano and an oil/vingear dressing.

Mozzarella Cheese - fast.

2 litres boiling water
1/2 cup salt
2 litres full cream (blue-lid) milk
1 tsp citric acid
2 tsp Renco (liquid rennet)

1 Make salt broth by boiling the salt and water in a pot until the salt dissolved. Cool. (I did this a few hours in advance, so the water was quite cold.)

2. Place milk in a deep microwaveable dish, and stir in the citric acid.

3. Microwave milk 6 minutes on high, then stir in Renco.

4. Microwave for 1 minute. Remove and drain some of the excess liquid.

5. Microwave 45 seconds more, then transfer gently into a colander, from which most of the liquid will drain from the curd.

6. Place the curds that remain into a bowl. Don the gloves, and form the curds into two or three balls. To get rid of the lumps, dunk each ball into boiling water and gently stretch and mould the curds. The heat of the boiling water will tranform the lumps so you can shape a reasonably smooth ball.

7. You're finished, apart from soaking the balls in the salty water for 20 minutes to add flavour.

8. Store covered in the fridge.

My experience:
:: maybe they need longer than 20 minutes of soaking, or the salty water should be warmer. I felt our cheese wasn't salty enough, but it was still delicate and delicious.
:: I wasn't sure how much to stretch and work the curds at the dunking-in-boiling-water stage. I did it for less than a minute, just enough to make the cheese smooth instead of lumpy. Possibly  bit longer might have been better, because some lumps remained, which you can see in the photo.

24 March 2013

Tins full of fruit cake

Recently I yet again had the good fortune to be offered a piece of my mother-in-law's fruit cake. It is GREAT.


Even the children loved it. She also uses it as her Christmas cake. After you've made it you'll wonder why anyone would bother to use any other recipe. It is easy, cheap and divine. Very moist. Definitely success-in-the-kitchen territory, and it fits with my idea of reasonable cost and reasonable quantities of sugar, butter and eggs for the resulting size of cake.

Knowing it had pineapple in it, I asked her if it was Alison Holst's pineapple Christmas cake. Oh no, she said. It's been around a lot longer than Alison Holst. Her mother had given her the recipe - my husband's grandmother - and mother-in-law herself is almost 82.

So, for the fruit-cake gourmands among you, as well as for those who like a good slab with a good cuppa, here it is. I think I'd double it for a big, traditionally sized Christmas cake. It freezes well.

Old Fruit Cake

Boil together for 3 minutes:-
1 lb (about 500g) mixed fruit - I used cranberries, sultanas and raisins
1 tsp mixed spice - I made it a very, very heaped teaspoon
1 1/2 cups sugar
1 15oz tin crushed pineapple (a standard 425 g tin)
1 tsp baking soda
4 oz (100g) butter

Let cool a little and mix in well:
2  cups plain flour
1 tsp baking powder
2 beaten eggs
A good slosh of sherry (1/3 to 1/2 a cupful)

Bake in 8" (20cm) square tin (papered) at 325 degrees F (160 degrees C) for 1 to 1/2 hours or until skewer inserted comes out clean (don't overcook!).

Prick when comes out of oven, pour over brandy (I used whiskey as we had no brandy, and mother-in-law tells me rum is fine too. Use two or three capfuls).

15 January 2013

Do the Hokey Pokey

I'm not sure whether the song goes "Do the hokey pokey", or "tokey", or "cokey," but hokey pokey is a very yummy New Zealand thing, and today my children made some.

I grew up perusing the sweets section of the Edmonds Cookbook, entranced with the realisation that I could eat the sweet treats if I made them - and I enjoyed making them. It was the beginning of learning how to cook.

My children have very much decided they're ready to do the same thing.

Today, with no guidance from me, Jack found himself in that same sweets section, and lit upon the Hokey Pokey recipe. "I'm going to make it," he said, happy to see there were only three ingredients (sugar, golden syrup and baking soda), all of which he knew we had.

After a minute or two of stirring the pot, he declared his arms weren't strong enough to stir and please could I take over? Nope.

He got there, and since then, he's eaten one bit and didn't really like it. In the excitement of seeing the frothing chemical reaction that occurs when the baking soda is added, we didn't mix it enough, and the remaining lumps of baking soda really put him off. Plus, this is the boy who still hasn't finished his Halloween lolly collection. Not a big eater.

His sister, however, is a fan and we keep chipping little bits off the crunchy mass for her.


It was she who set them on this baking path. Yesterday she had a friend visiting and announced, "Kate and I can both read now, so we can cook." She found a chocolate cake recipe from a book in the bookshelf and set about baking it herself.

All the years she's been helping me paid off. She could do everything beautifully (wearing her apron, of course). I had the chance to observe this because, Kate, I'm sorry to say, was hardly allowed to do anything, including eat it, because she had to leave before it was baked. It is, however, a huge and delicious cake.


Ian is unimpressed by this turn of events and has declared that he will not clean up the mess. I take the opposite line and heartily support it, because I can see that it will mean less baking for me.

Hokey Pokey (from the Edmonds Cookery Book)

5 tablespoons sugar
2 tablespoons golden syrup
1 tsp baking soda

Put sugar and golden syrup into a saucepan. Heat gently, stirring constantly until sugar dissolves. Increase the heat and bring to the boil. Boil for 2 minutes. Stir occasionally, if necessary, to prevent burning. Remove from heat. Add baking soda. Stir quickly until mixture froths up. Pour into a buttered tin immediately. Leave until cold and hard. Break into pieces.

21 December 2012

Mince pie fuss pot

Maybe there are fruit mince pies besides my own that I like, but I've never found them. I use my Nana's recipe.

I remember being about seven years old and at the beach with some neighbours, and gladly taking the mince pie offered to me because I loved Nana's so much. It was horrible. I was very embarrassed but finally plucked up the courage to ask the grandfather-neighbour what I should do with it because I didn't like it. He whispered to me in reply, telling me to wade out into the sea and drop it by one of the boats anchored there. So I carefully crushed it into my hand so no one else could see it, waded into the water and secreted it there. Our little secret.

Christmas came alive for me today, because I baked mince pies. Both children helped me. I told them how this was my Nana's recipe, and that when I asked her how much fruit to put into each tart, she told me to be generous, not stingy, with the filling. I had to ask her because the recipe she wrote me out contained almost no instructions.


It was a time full of memories. I used her rolling pin for the pastry, and her tart tins for the little pies. We cut three little vents in each lid, just like she did.


For the first time this year I used suet, which, I found out when I bought it, is flaky beef fat. Yuck. But YUM! It really holds the flavour. For both the fruit mince (which I made last week) and pastry I could only bring myself to use half the amount of fat she did.


In future I must remind myself that she made enough to last us for many weeks, eating them every day. She'd portion them out into old, clean bread bags and put them in our chest freezer. Her quantity of fruit mince was made accordingly. We made about 70 pies today and we are only half way through the mince. I have no chest freezer! Help!


After I'd made a few tray fulls I realised something was wrong. The pastry underneath the bottom of the pies wasn't translucent. Nana must have rolled it paper thin. The rest of the tray fulls are better, but I suspect my mother will notice they're still not thin enough. That's another reason to make them in October, as Nana did - the air temperature is in the teens instead of  the mid 20s, and pastry behaves better when it's kept cool.

However, the other people in this house don't care about thick pastry - they love'em!
Related Posts Plugin for WordPress, Blogger...